Do you still feel frustrated that you can’t enjoy your favorite videos on portable devices at will?
Now, a professional software—Aiseesoft
Video Converter for Mac
can help you to solve all the problems. With it, you can convert between all popular video and audio formats with super fast conversion speed and high output quality, such as AVI, MP4, MOV, MKV, WMV, DivX, XviD, MPEG-1/2, 3GP, 3G2, VOB Video, MP3, AAC, and AC3 Audio etc. In addition, the best video converter for Mac can also extract audio from video file and convert video to MP3, AC3, and AAC…as you want.
OK, let’s move to how to use the amazing software.
Step 0: Download and install Aiseesoft Video Converter for Mac.
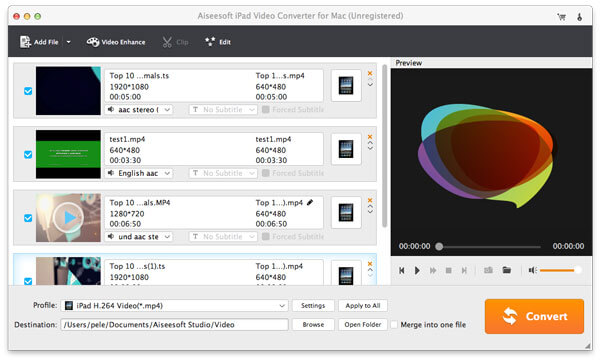
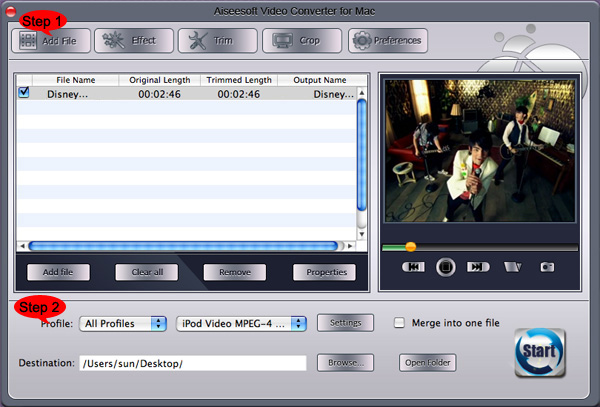
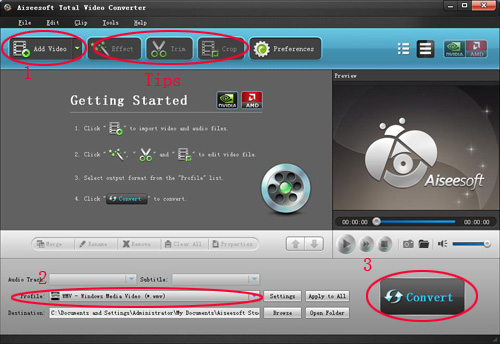
After a while, you can use the following interface:
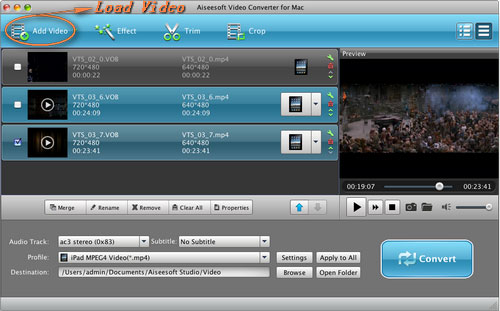
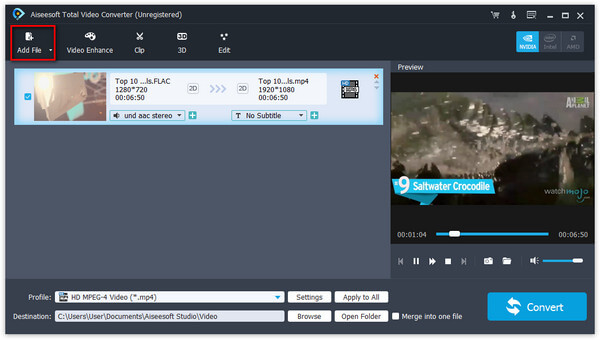
Step 2. Load Video
You can load your video by clicking “Add File” button or clicking “File” button, you can choose “add file” on a drop-down list.
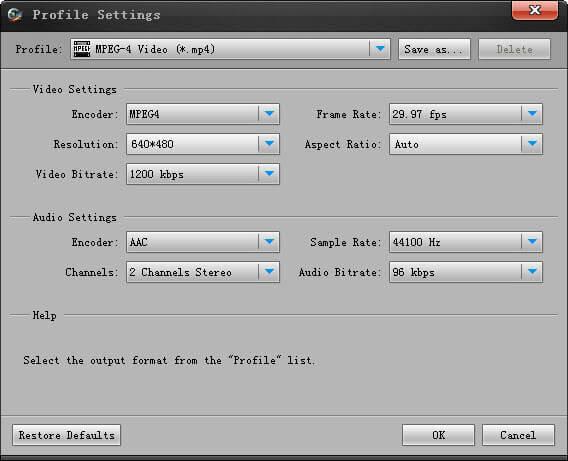
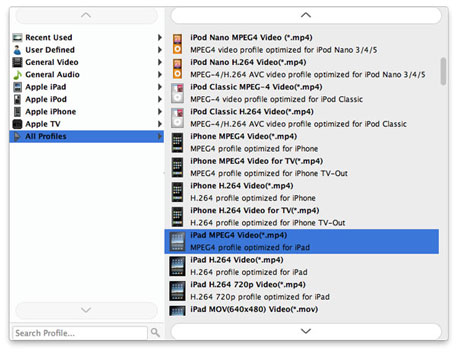
Step 3. Output format and Settings
From the “Profile” drop-down list you can find one format that meets your requirement.
After doing the 3 steps above, you can click “start” button to start conversion.
Wait a minute, the conversion will be soon finished.
Tips:
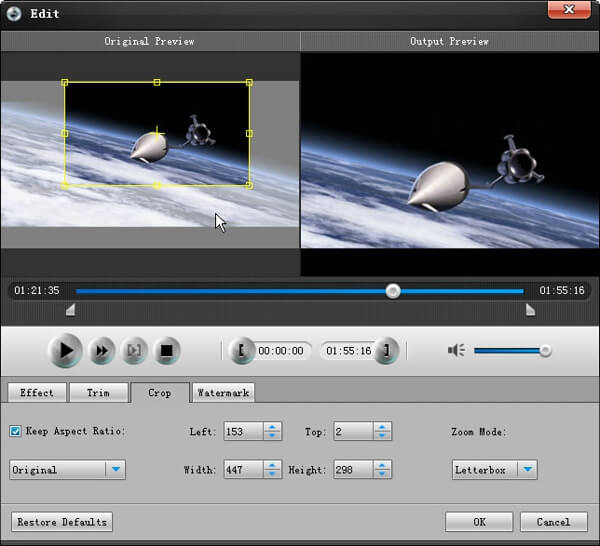
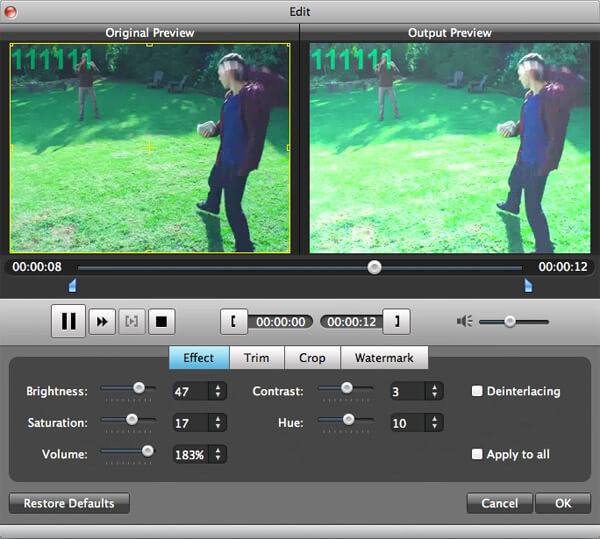
1. Trim
"Trim" function is for you to select the clips you want to convert.
There are 3 ways that you can trim your video.
a. You can drag the buttons(1) to set the start and end time
b. You can preview the video first and when you want to start trim click the left one of the pair buttons(2) when you want to end click the right one.
c. You can set the exact start and end time on the right side of the pop-up window.
It is for you to select the clips you want to convert.
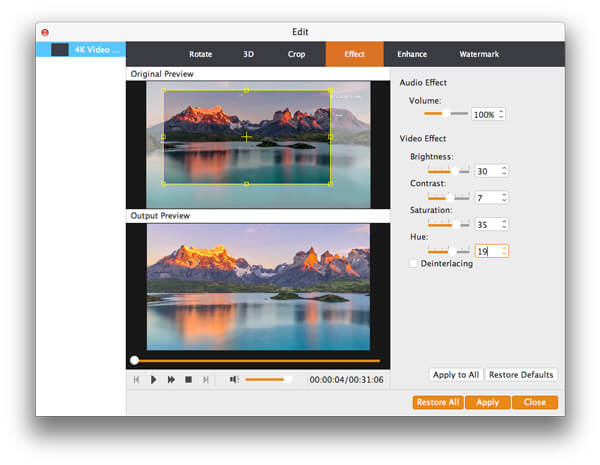
2. Crop
Cut off the black edges of the original movie video and watch in full screen using the "Crop" function.
There are 3 ways that you can crop your video.
a. We provide 7 modes on our “Crop Mode”(1)
b. You can set your own mode on the right side of the pop-up window(2)
c. You can drag frame to set your own crop mode(3)
You can cut off the black edges of the original movie video and watch in full screen using the "Crop" function.
3. Snapshot and merge into one file
If you like the current image of the video you can use the “Snapshot” option. Just click the “Snapshot” button the image will be saved and you can click the “Open” button next to “Snapshot” button to open your picture.
If you want to make several files output as one you can choose “Merge into one file”.
If you are windows users, you can go to Aiseesoft Total Video Converter to get more information.